As a scientific author today you pick your template before you start writing: what journal, what thesis template, what conference. If your work gets rejected, needs to be submitted somewhere else, or you want to share in another medium like a blog or presentation: these initial choices hold you back and it takes time and effort to migrate your work. At Curvenote we are flipping this idea: pick your template last!
We believe in sharing science in different mediums and formats to improve accessibility — in blogs, papers, thesis, presentations, and interactive websites. To do this, you need exacting control over a templating engine that is data-driven and structured, and you need a writing tool that helps you structure your content such that it can be reused in multiple ways. At Curvenote, this is core to what we do.
Our collaborative editor sits atop a modern translation system so you can access your content in any format and also have fine-grained control over the final presentation. To create scientific PDFs we are releasing a new LaTeX templating system called jtex and are curating an open-template repository that currently covers over 350 journals in a standardized, data-driven way. We built these tools to address the variability and problems that we have encountered in translating and presenting scientific content in many different templates and formats over the past few years.
We released jtex under a permissive open-source license (MIT) allowing anyone to create their own templates using a customized Jinja2 renderer in Python. In this article we will walk through the library and our goals, compare and contrast with the Pandoc ecosystem, and give you enough context to get started using jtex.
LaTeX
LaTeX is a powerful, beautiful, and precise typesetting system that lets you design and create rich professional papers, reports, and documents. In reality, though, you’re more likely to be using LaTeX to fit your writing, equations, figures, and results within someone else’s typesetting design — like from a journal or university.
LaTeX is a huge ecosystem, with many contributing packages, and multiple ways to solve any particular formatting requirement. So naturally, we see a lot of variation in the templates that people are expected to use, from university to university or from journal to journal. This means even if you are comfortable with LaTeX, a particular template could still send you down an unfamiliar formatting rabbit hole.
Generally, templates are provided in a few different ways:
- Skeleton
.texfiles with layout and placeholder content interleaved where you’re expected to strip out the placeholder content and insert your own as you go. - Style
.styfiles that can be loaded as packages to alter and introduce environments and commands within one of the standard LaTeX document classes. - Class
.clsfiles that define a whole document class to work within
Beyond that, the template, in whichever of these base forms, can use any selection of packages they choose, can rewrite LaTeX commands and environments, and take completely different approaches to providing particular features, like; corresponding author information, citation and bibliography styles, and source code rendering.
Larger institutions and organizations who lean heavily on LaTeX also create templates with many configuration options. A single LaTeX template can actually serve 10’s or 100’s of different end publications with different flavors of an overall style. For example, the MDPI template which we recently ported to Curvenote can target over 300 different MDPI publications with different options depending on each choice!
All this means significant learning curves and overhead for researchers working in LaTeX, especially if they want to publish in more than one place. Learn LaTeX, then learn the template, packages, and the quirks of the template.
Creating data driven LaTeX templates means this overhead is encountered once, when creating the template or adapting an existing one, and once complete many different LaTeX documents can be produced by “rendering” that template with different data.
Pandoc
One of the first technologies to look at when thinking about moving a written document between different formats is the Pandoc project.
Pandoc is a universal document converter capable of high-quality conversions to, from, and between over 48 different document formats. Beyond just text conversion it understands media, directives, and metadata and is able to preserve/translate these during conversion. Its capabilities are quite awe-inspiring and it’s increasingly used by writers who want a minimalist writing experience in Markdown to target the formats that they need.
Pandoc templates
Pandoc comes with a built-in templating feature, which is powerful and links to Pandoc’s underlying data structures.
Pandoc’s templating syntax is very close to the Jinja style that we have embraced in Curvenote LaTeX templates, with variable interpolation, control flow, partial templates, and filters all available with specializations for different output formats.
For LaTeX, Pandoc provides a complete default template that allows the rendering of a document with metadata and content. The default template is complete but complex, and as a reference point for users to make their own templates, this can be pretty overwhelming.
Pandoc is of course set up for document conversion, so the starting point for rendering a document is a complete document in another format. For example, a Markdown document, when provided alongside a yaml file, containing document metadata, will render a document against the default or a custom template. Pandoc does an exceptional job at this conversion task.
Why not Pandoc?
So why not just use Pandoc to power exporting to LaTeX in Curvenote?
Well, we did consider this — but decided that our end goal was different to that of Pandoc’s. While Pandoc is about document conversion, Curvenote’s goal with LaTeX is to provide the means to support many different types of existing LaTeX templates with a single templating system.
We need to be able to interface with people’s templates and while that might be perfectly possible with Pandoc, some of the things we value as part of that are:
- An easy to read syntax that stands out against LaTeX
- Compact templates where template creators do not have to explicitly include boilerplate code to support complex environments and schemas
- The ability to manipulate content flow and render specific content differently on a per template basis
- Flexibility to easily add opinionated behaviours to the engine to specifically support Curvenote’s needs
- Python level transformations so we don’t have to rely solely on LaTeX commands/environments in our implementation
Curvenote LaTeX Templates
Having stated our aims above, let’s talk about our implementation. There are a few different components to talk about here:
- jtex - a lightweight templating engine that provides a simple command line interface (CLI)
- Curvenote’s Open Template Repository - a collection of templates ported to use in Curvenote or through these open-source command line tools
- curvenotepy - a python client library and CLI that can pull content from the Curvenote API
We’re going to focus on the first two in this post.
Curvenote template
In our templating CLI jtex, we’ve implemented a modified Jinja environment to provide a clear syntax that stands out well against LaTeX content and markup. The basic markup structure comprises Statements, Expressions and Comments as follows:
Table 1:Curvenote’s LaTeX template syntax alongside the standard Jinja markup
Customized | Standard Jinja2 | |
|---|---|---|
Statements |
|
|
Expressions |
|
|
Comments |
|
|
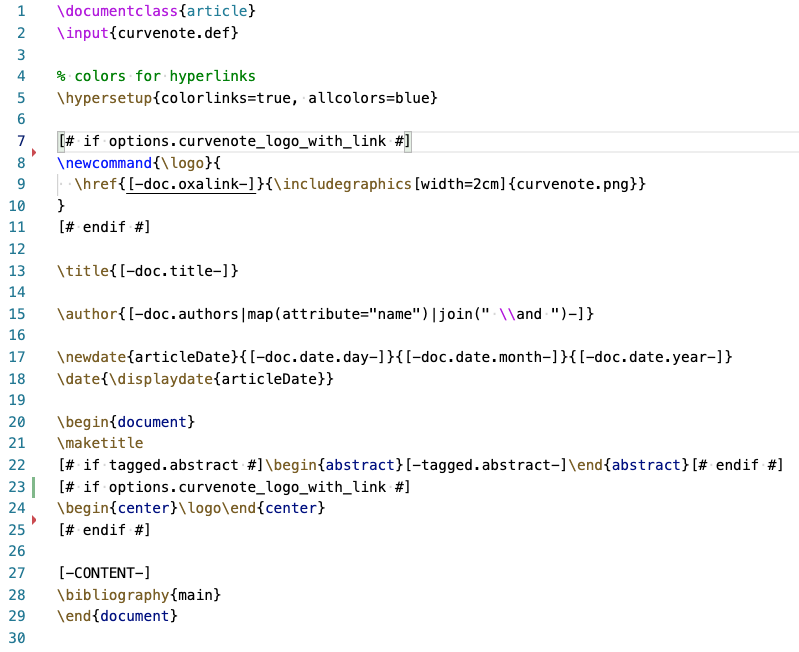
This syntax works nicely resulting in templates that look like this:
If you are not familiar with how Jinja templates are constructed their template designer documentation is excellent and worth a read. Between the Jinja docs and our README there is plenty of detailed information on how to construct templates. So we’ll only touch on some of the main points here.
- Nested data structure - You’ll notice in expressions (e.g. line 13 in the figure above), we are able to expand variables like so,
[-doc.title-]. When we pass data tojtexin the form of adict, we can have multiple levels of nesting and access data fields using dot or square brackets operators, e.g.[-doc['title']-]. - Insert control flow statements -
[# if options.a #] Some LaTeX [# endif #]While this is clear, we also have access to the complete Python-like Jinja environment between the[#,#]so you can do things like set persistent variables that remain available elsewhere is the template. - Jinja filters - These filters allow typical functional programming style manipulation of data, e.g. line 15, where we expand the list of authors
- Python builtins - The module has also been added to the environment, which provides access to other common functions like
zip. - Specialized variables -
[-CONTENT-]is a special variable like Pandoc’sbodytag that allows insertion of the main body of content into a template.
We’ve also made some other LaTeX friendly modifications to the Jinja environment that you can read about here.
Given our ability to create templates, how does the CLI work? There are two modes of operation: build-lite and build.
Command: build-lite
This is a lightweight un-opinionated command that will allow you to render a LaTeX document against any free-form template that you come up with. You will need a .yml file with your corresponding data structure (let’s call it a DocModel, short for document model) and a .tex file with your main body content.
In this way, using jtex is similar to a Pandoc template, except that it is free form. Other than the [-CONTENT-] variable there are no other built in variables or metadata. As you craft a template, you define the DocModel as you go and the CLI will render anything you define.
Example
Given these three files:
# data.yml
title: Exploring Outer Space
author:
  name: Ana Space
  email: ana@outer.space
% content.tex
Outer space is the expanse that exists beyond Earth and between celestial bodies. Outer space is not completely empty—it is a hard vacuum containing a low density of particles, predominantly a plasma of hydrogen and helium, as well as electromagnetic radiation, magnetic fields, neutrinos, dust, and cosmic rays.% template.tex
\documentclass{article}
\title{[-title-]}
\author{[-author.name-] ([-author.email-])}
\begin{document}
\maketitle
[-CONTENT-]
\vskip 1cm
The End!
\end{document}and by calling:
# jtex build-lite TARGET DATA CONTENT TEMPLATE
jtex build-lite output.tex data.yml content.tex template.texwe will render the following LaTeX document:
% output.tex
\documentclass{article}
\title{Exploring Outer Space}
\author{Ana Space (ana@outer.space)}
\begin{document}
\maketitle
% content.tex
Outer space is the expanse that exists beyond Earth and between celestial bodies. Outer space is not completely empty—it is a hard vacuum containing a low density of particles, predominantly a plasma of hydrogen and helium, as well as electromagnetic radiation, magnetic fields, neutrinos, dust, and cosmic rays.
\vskip 1cm
The End!
\end{document}which when compiled to PDF gives us:

This is a simple example but what is useful here is the fact that we have a completely free-form templating process that can easily be adapted to suit a particular workflow. To get started with templates using build-lite check the readme for more info. In the future, we will also show how this can be used with Pandoc for document conversion, and then last-mile style choices being templated with jtex.
Command: build
The build command uses a standardized YAML format that we have developed in looking at many different LaTeX templates, this is the format outlined in our open template collection. The structure of the document model used here is prescriptive but configurable via three configuration mechanisms; schema, tagged content and template options — more on this in the next section.
Templates can be pulled directly from the Curvenote API or from a local folder. This makes it possible to test templates that are in development or being ported to this standardized format.
jtex build [OPTIONS] CONTENT_PATH OUTPUT_PATHThe command line itself is very similar to the build-lite command except that we now deal with input (content) and output folders, rather than single files. This allow us to pull together various files including images, a .bib file and various template files, into a consistent package.
The CONTENT_PATH argument should point to a directory containing the following files:
data.yml- a yaml file containing the data in line with the expected document modelmain.tex- containing the main content to be rendered at[-CONTENT-]main.bib- a bibliography file if needed
These files will be used to render a LaTeX document at the OUTPUT_PATH with either the built-in default template or any other template specified using the --template-path or --template-name options. --template-path uses a local template, while --template-name will fetch from the Curvenote API (e.g. here is AGU2019 template).
Find out more about the build command in the readme.
Curvenote LaTeX Templates
Our aim here is to be able to take any existing LaTeX template, make it data driven and available as an export option directly within Curvenote. In addition to the template markup that we have already talked about, templates have a simple but expected structure and a configuration file.
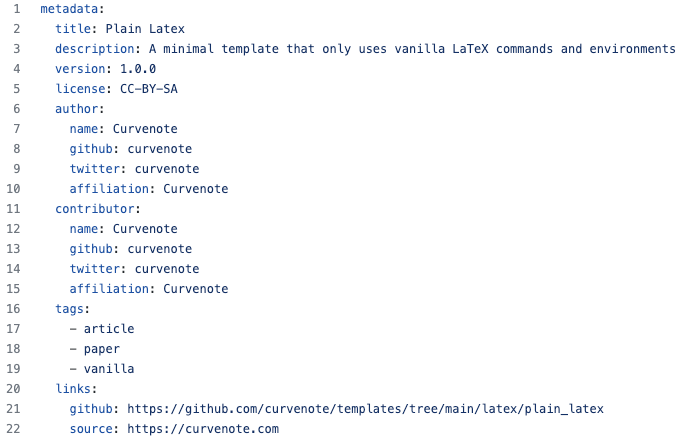
Let’s use the simplest template we have, plain_latex, as a minimal example. This template provides minimally styled LaTeX and PDF output. It’s template folder looks like:
| Configuration file |
|---|---|
| The main template file which may |
| Any image assets required by this template, or the associated |
| Will be shown on curvenote |
| Example content used for testing and to generate the thumbnail.png |
template.tex
This is where the template content, custom commands/environments are defined and pulled together using the template markup. We’ve covered a lot of this in examples above but one additional feature to note is the \input{curvenote.def} command.
This command is included at the start of each template and pulls in a curvenote.def file that is generated during the rendering process. That file contains commands to include packages, setup options - and if needed custom LaTeX commands, and environments if needed to interface between Curvenote’s schema and those in use in the template. The content of that file is influenced by the “schema” section in the configuration file.
Configuration (template.yml)
The configuration is a simple yaml file with a metadata and a config section, laid out and validated against the schemas defined here and here.
Metadata
The metadata section defines the template and is largely informational, providing key details about licensing, source, and social-media usernames.
The config section splits into four sub sections: build, schema, tagged, options.
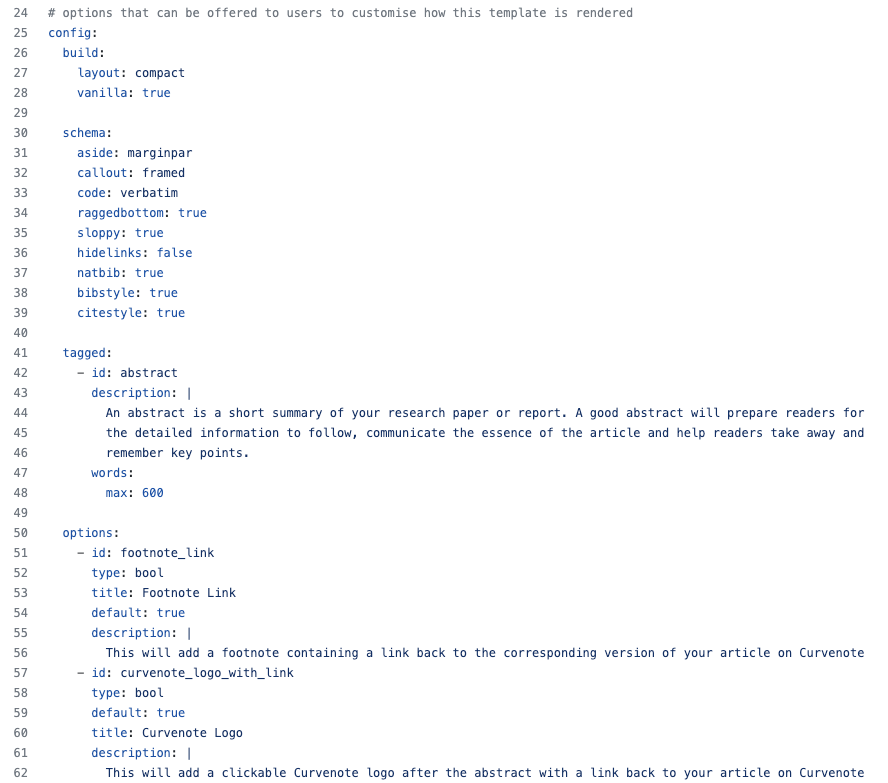
config.build
Commands in this section influence the output structure of the LaTeX document.
- layout -
compactandbookoptions will be supported with asinglefile option in the near future. - vanilla - When true, this instructs the
curvnotepyPython client to request content in vanilla TeX from the Curenote API rather than TeX content that uses Curvenote’s custom environments. It will also prevent custom environment definitions from being added tocurvenote.def.
config.schema
The schema section is used to configure how Curvenote’s LaTeX output should be represented in the template LaTeX. Individual schema options allow template creators to specify how these elements should be handled on a case by case basis.
Take the Curvenote callout as an example.
However, when we translate this to a template it may have no direct equivalent - so how should we handle it? In this case, provided vanilla is false, the callout will be represented by the following LaTeX when the API returns that content.
\begin{callout}
In Curvenote, a callout looks like this, with various color options available.
\end{callout}
In the schema section, we can add a callout key with one of the following values to tell the renderer how this should be handled:
default | Apply whatever the default behaviour is. This is the same as not providing the key in the first place. |
|---|---|
callout | Include environment definitions to implement custom styling on the environment, aligning it with the Curvenote web experience. |
mdframed | Convert callouts to |
framed | Convert callouts to |
callout.def | Include a locally available |
There are a number of options right now, some multi-valued like callout, while other are booleans and used to control other LaTeX behaviours. Here’s the current list: aside, callout, code, raggedbottom, sloppy, hidelinks, natbib, bibstyle, citestyle.
This is an area which we expect to expand further as we include more templates into the repository. These will include templates for papers, reports, articles, theses, books, posters, and more. We expect to have to deal with a fair amount of variation. Watch out for more documentation on using these in our open template repository.
config.tagged
Tagged content is a mechanism through which we can reroute the main content flow.
When a Curvenote article is rendered the main body of content will be inserted into the document at the [-CONTENT-] statement. The exception to that are any blocks of content that have been tagged in Curvenote with a tag listed in the tagged section of the config.
That content will be pulled from the flow and made available to the template in a variable. For example, the abstract tagged content below will be available in the variable tagged.abstract in the template at render time.

The configuration for the tagged content allows for a description and a word count (character count coming soon!) which will be shown and used in the Curvenote API. This allows very specific guidance about a particular template’s requirements. A piece of tagged content can also be marked as required.
Then the template can place the abstract content exactly where it’s needed with a snippet like this:
[# if tagged.abstract #]
\begin{abstract}
Abstract: [-tagged.abstract-]
\end{abstract}
[# endif #]
This allows a template creator to expose features to the end user in Curvenote with helpful descriptions, and if required, enforcing that the tagged content must be available in order to use the template. Tagged blocks will appear to the user like so:
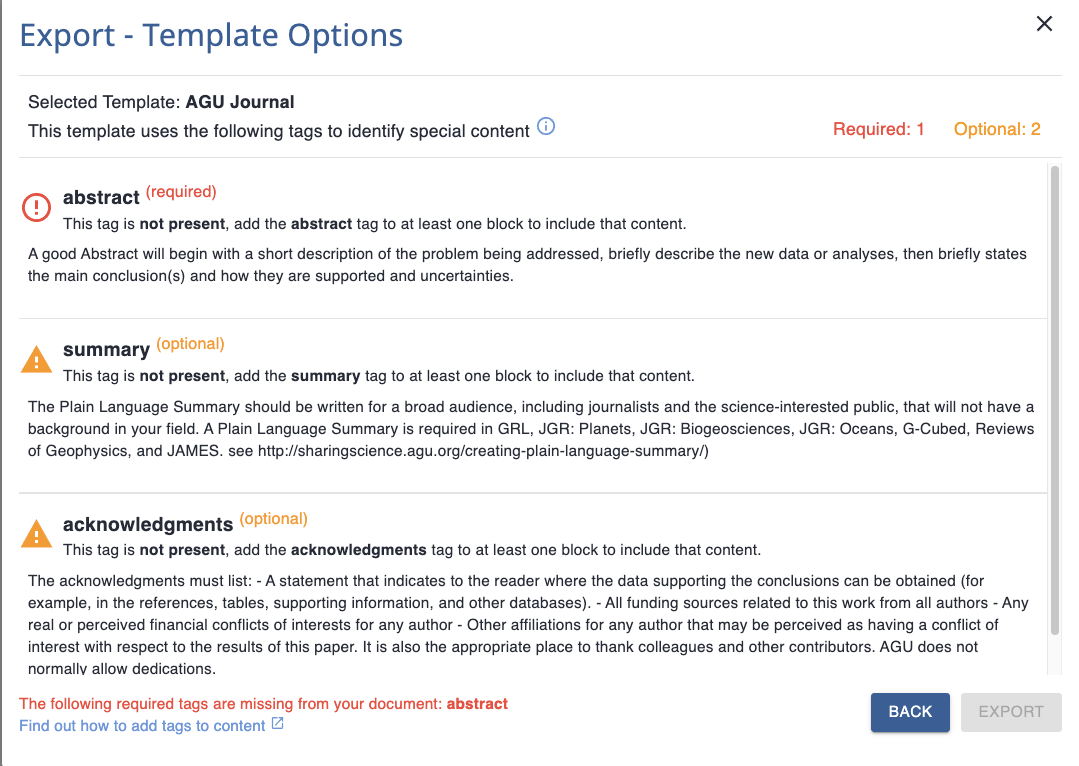
config.options
Similar to tagged content, a template can define a number of options that should be exposed to an end user. These “options” can be used to request additional data like corresponding author information or prompt to set template options like draft, document type, paper size etc. The plain_latex template specifies two options both of type bool.
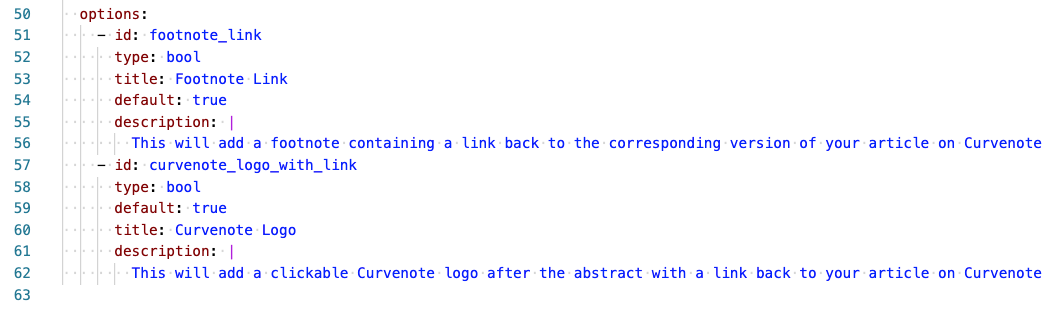
Options are specified with a unique ID and description. Options can also be required or left as optional and the Curvenote UI will enforce that rule. In addition to booleans, options can be of type: str, choice, keywords, corresponding_author.
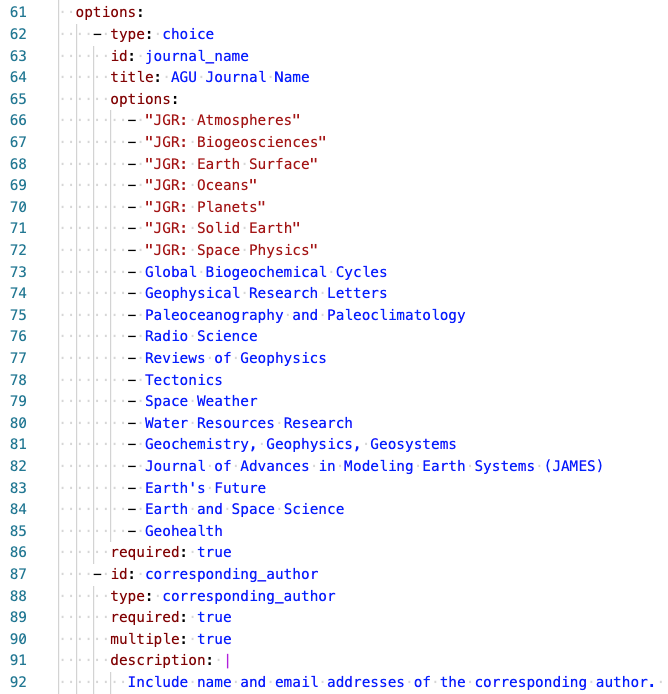
Here is an additional example, of how the AGU2019 template specifies two of these fields to set the journal name and request information on one or more corresponding authors.
Document Model
We saw when using the jtex build-lite command above that the renderer receives a dict like structure that is access from the templates. When using jtex build the structure of that dict is no longer free form and instead should contain data corresponding to both built-in fields and the options and their tagged content blocks specified in the configuration. The data structure is required in this form in order for a given template to render properly.
An example of a document model for the plain_latex template is here and also shown below.
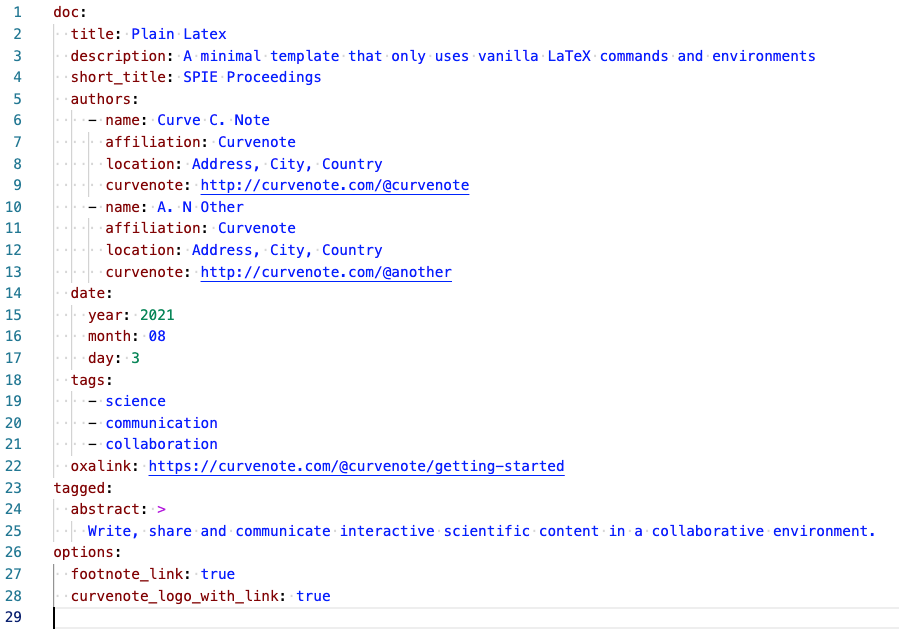
At the root level there are doc, tagged and options sections where the latter two correspond to the respective configuration sections. The doc section is set by Curvenote and provides key data fields related to the article itself including the title, authors list and date.
When developing Curvenote templates we can stub out data structures like this in a yaml file and use them with jtex build to test our template as we go.
Create a data driven template
Is there a template that you need to use that is not yet available?
- Open an GitHub issue - leave us a link to the template source and we’ll port the template for you!
- Open a Pull Request - if you have a template that you want to port, we’re happy to review and accept contributions. We can also help you get a PR over the line if you’ve made a start!
We’re building our LaTeX templating system to access any template you need, while writing in an editor that allows you to focus on your work with the confidence that you can export to any format.